
Learning how to restring a guitar is the most useful maintenance skill you will ever pick up. This guide walks you through the full process on steel-string acoustic, electric, and classical guitars, step by step.
The quick answer (6 steps, 10–20 minutes):
- Loosen and remove the old strings
- Clean the fretboard while it is bare
- Seat the new strings at the bridge
- Wind them onto the tuning posts, 2–3 wraps each
- Stretch and tune, then retune until stable
- Trim the excess and play
Quick CTA:
- Open the online guitar tuner: you will need it for step 5
- Guitar won't stay in tune?: if restringing alone does not fix it
Why bother at all? Fresh strings restore brightness and sustain, hold tuning better than corroded old ones, feel smoother under your fingers, and are far less likely to snap mid-song.
Tools and Materials You'll Need
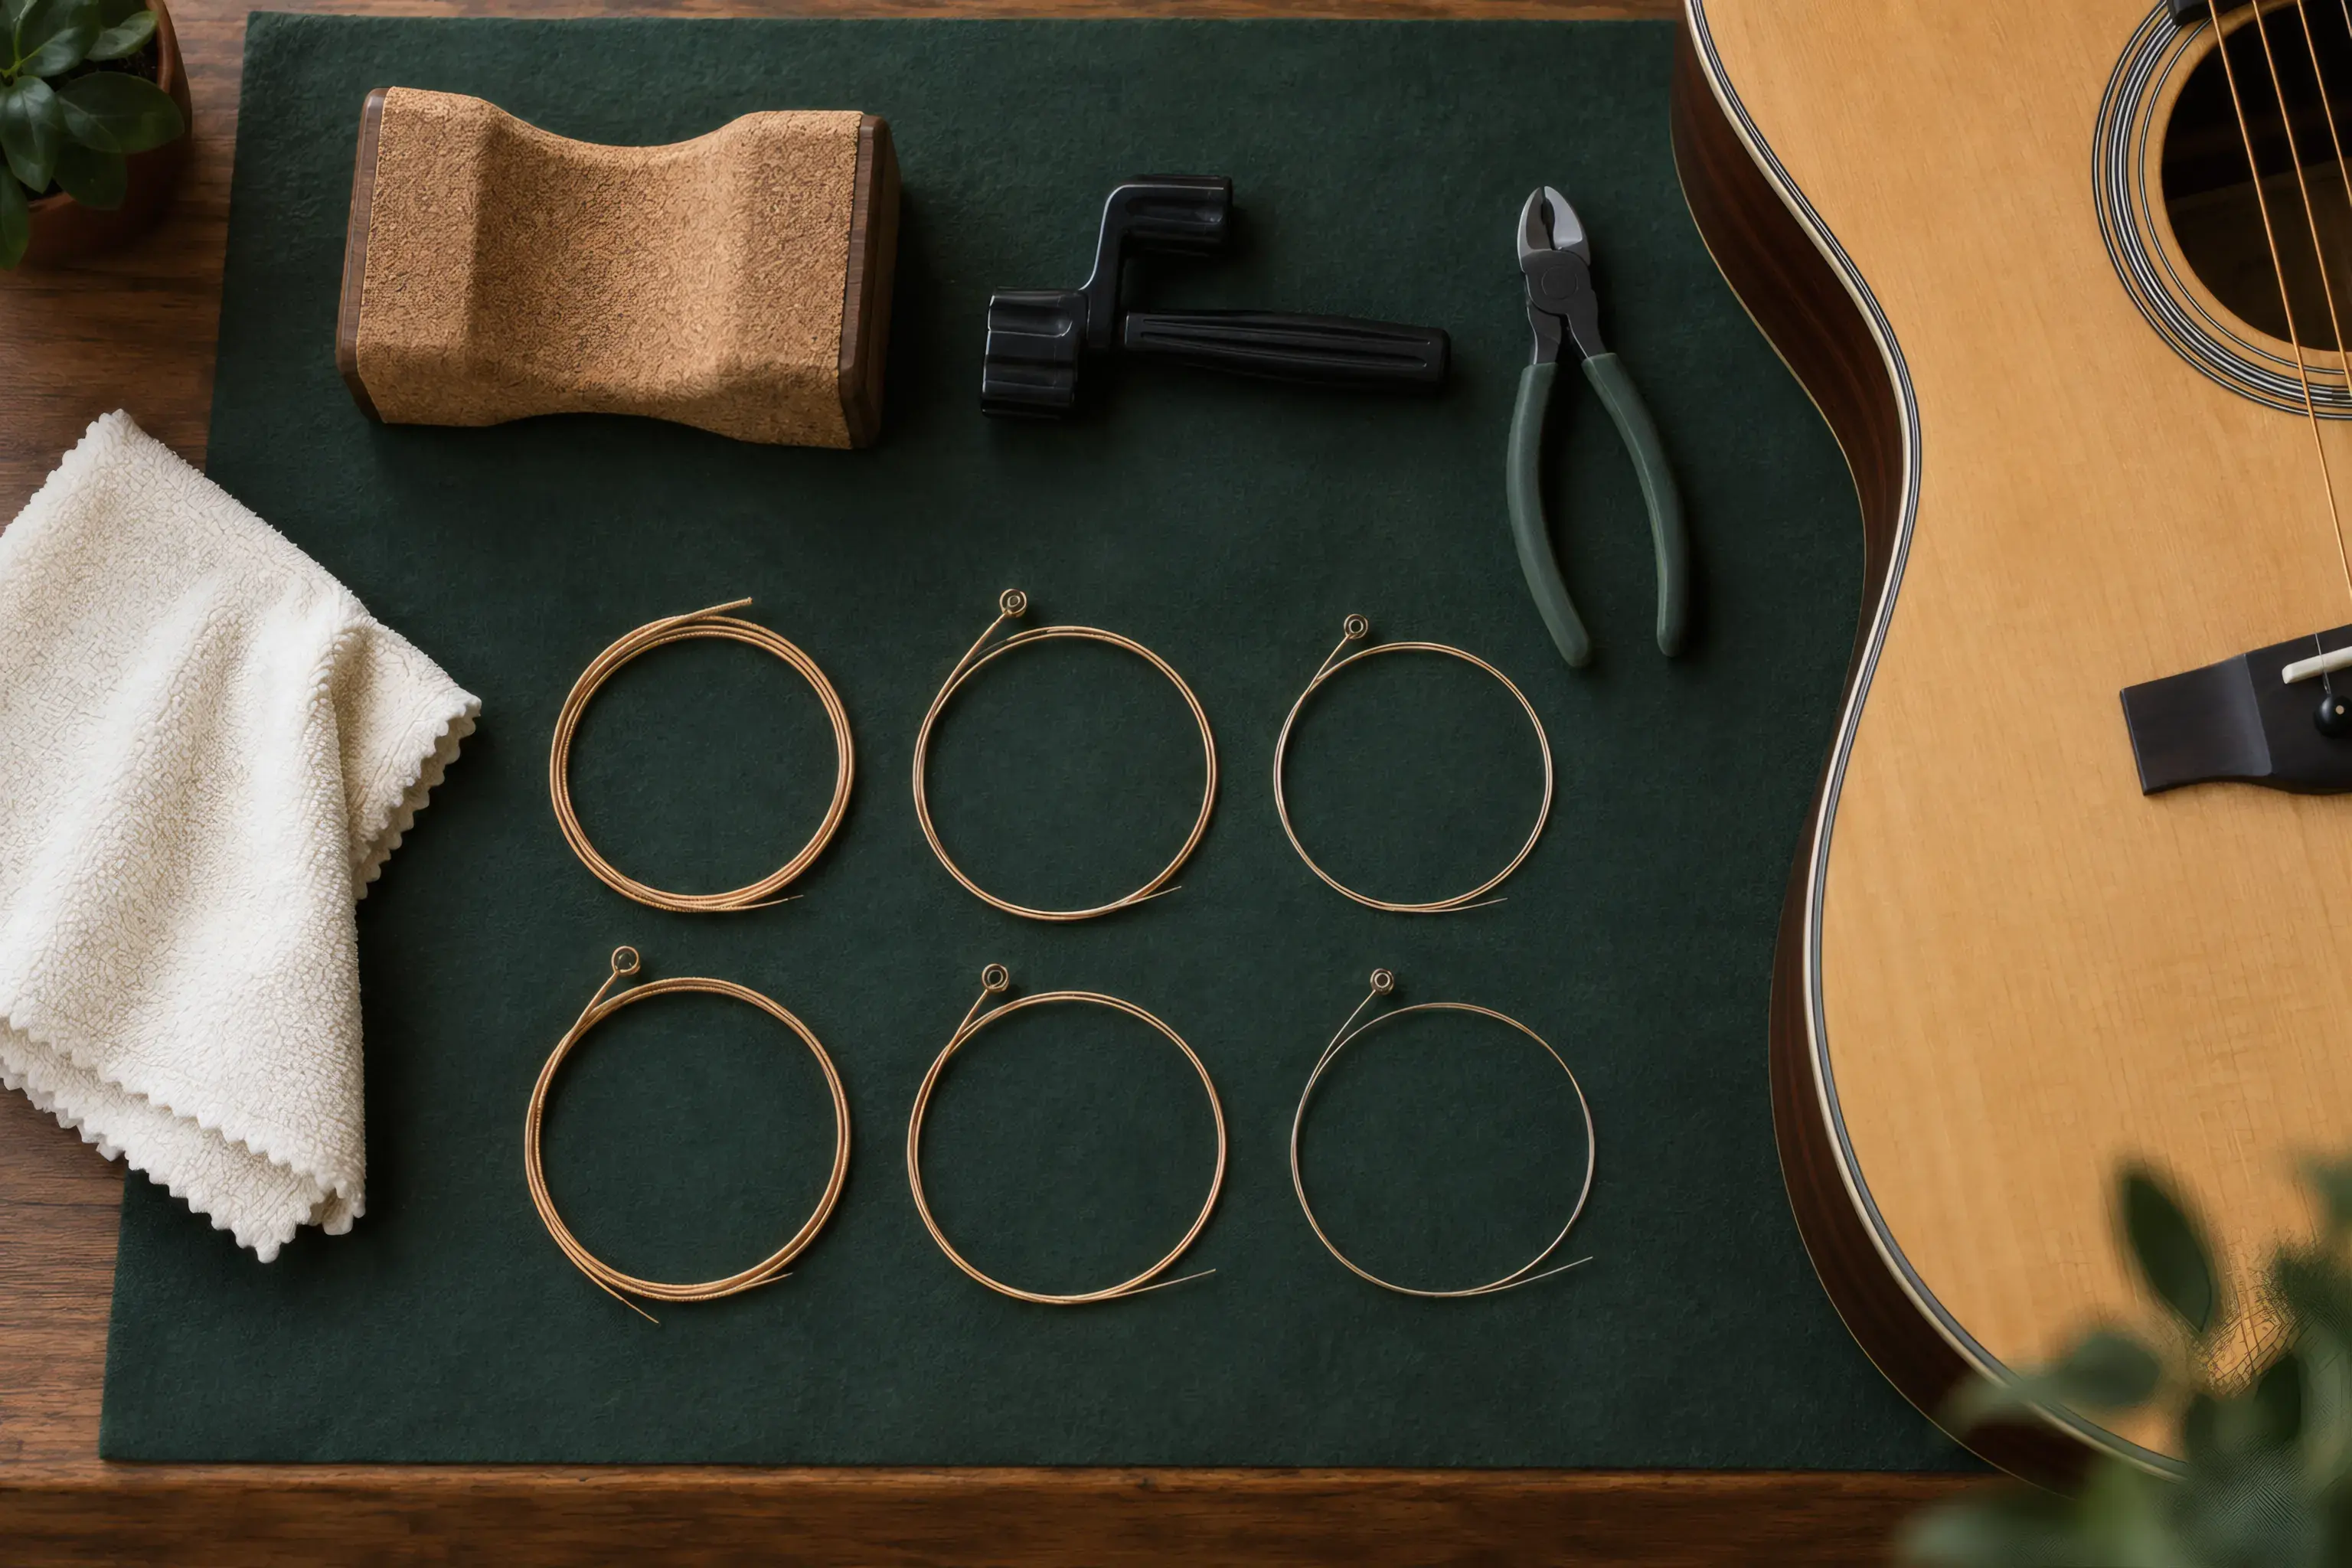
You can restring a guitar with nothing but the strings themselves, but a few cheap tools make it faster and cleaner.
- New strings. One full set, correct for your guitar type; never put steel strings on a classical guitar. Gauge suggestions by playing style are in the String Gauges Explained section below.
- String winder (peg winder). Spins the tuning machine for you and turns ten minutes of winding into ninety seconds.
- Wire cutters. For trimming the excess string ends. Nail clippers work in a pinch.
- A tuner. Any accurate tuner works; the online guitar tuner runs in your browser.
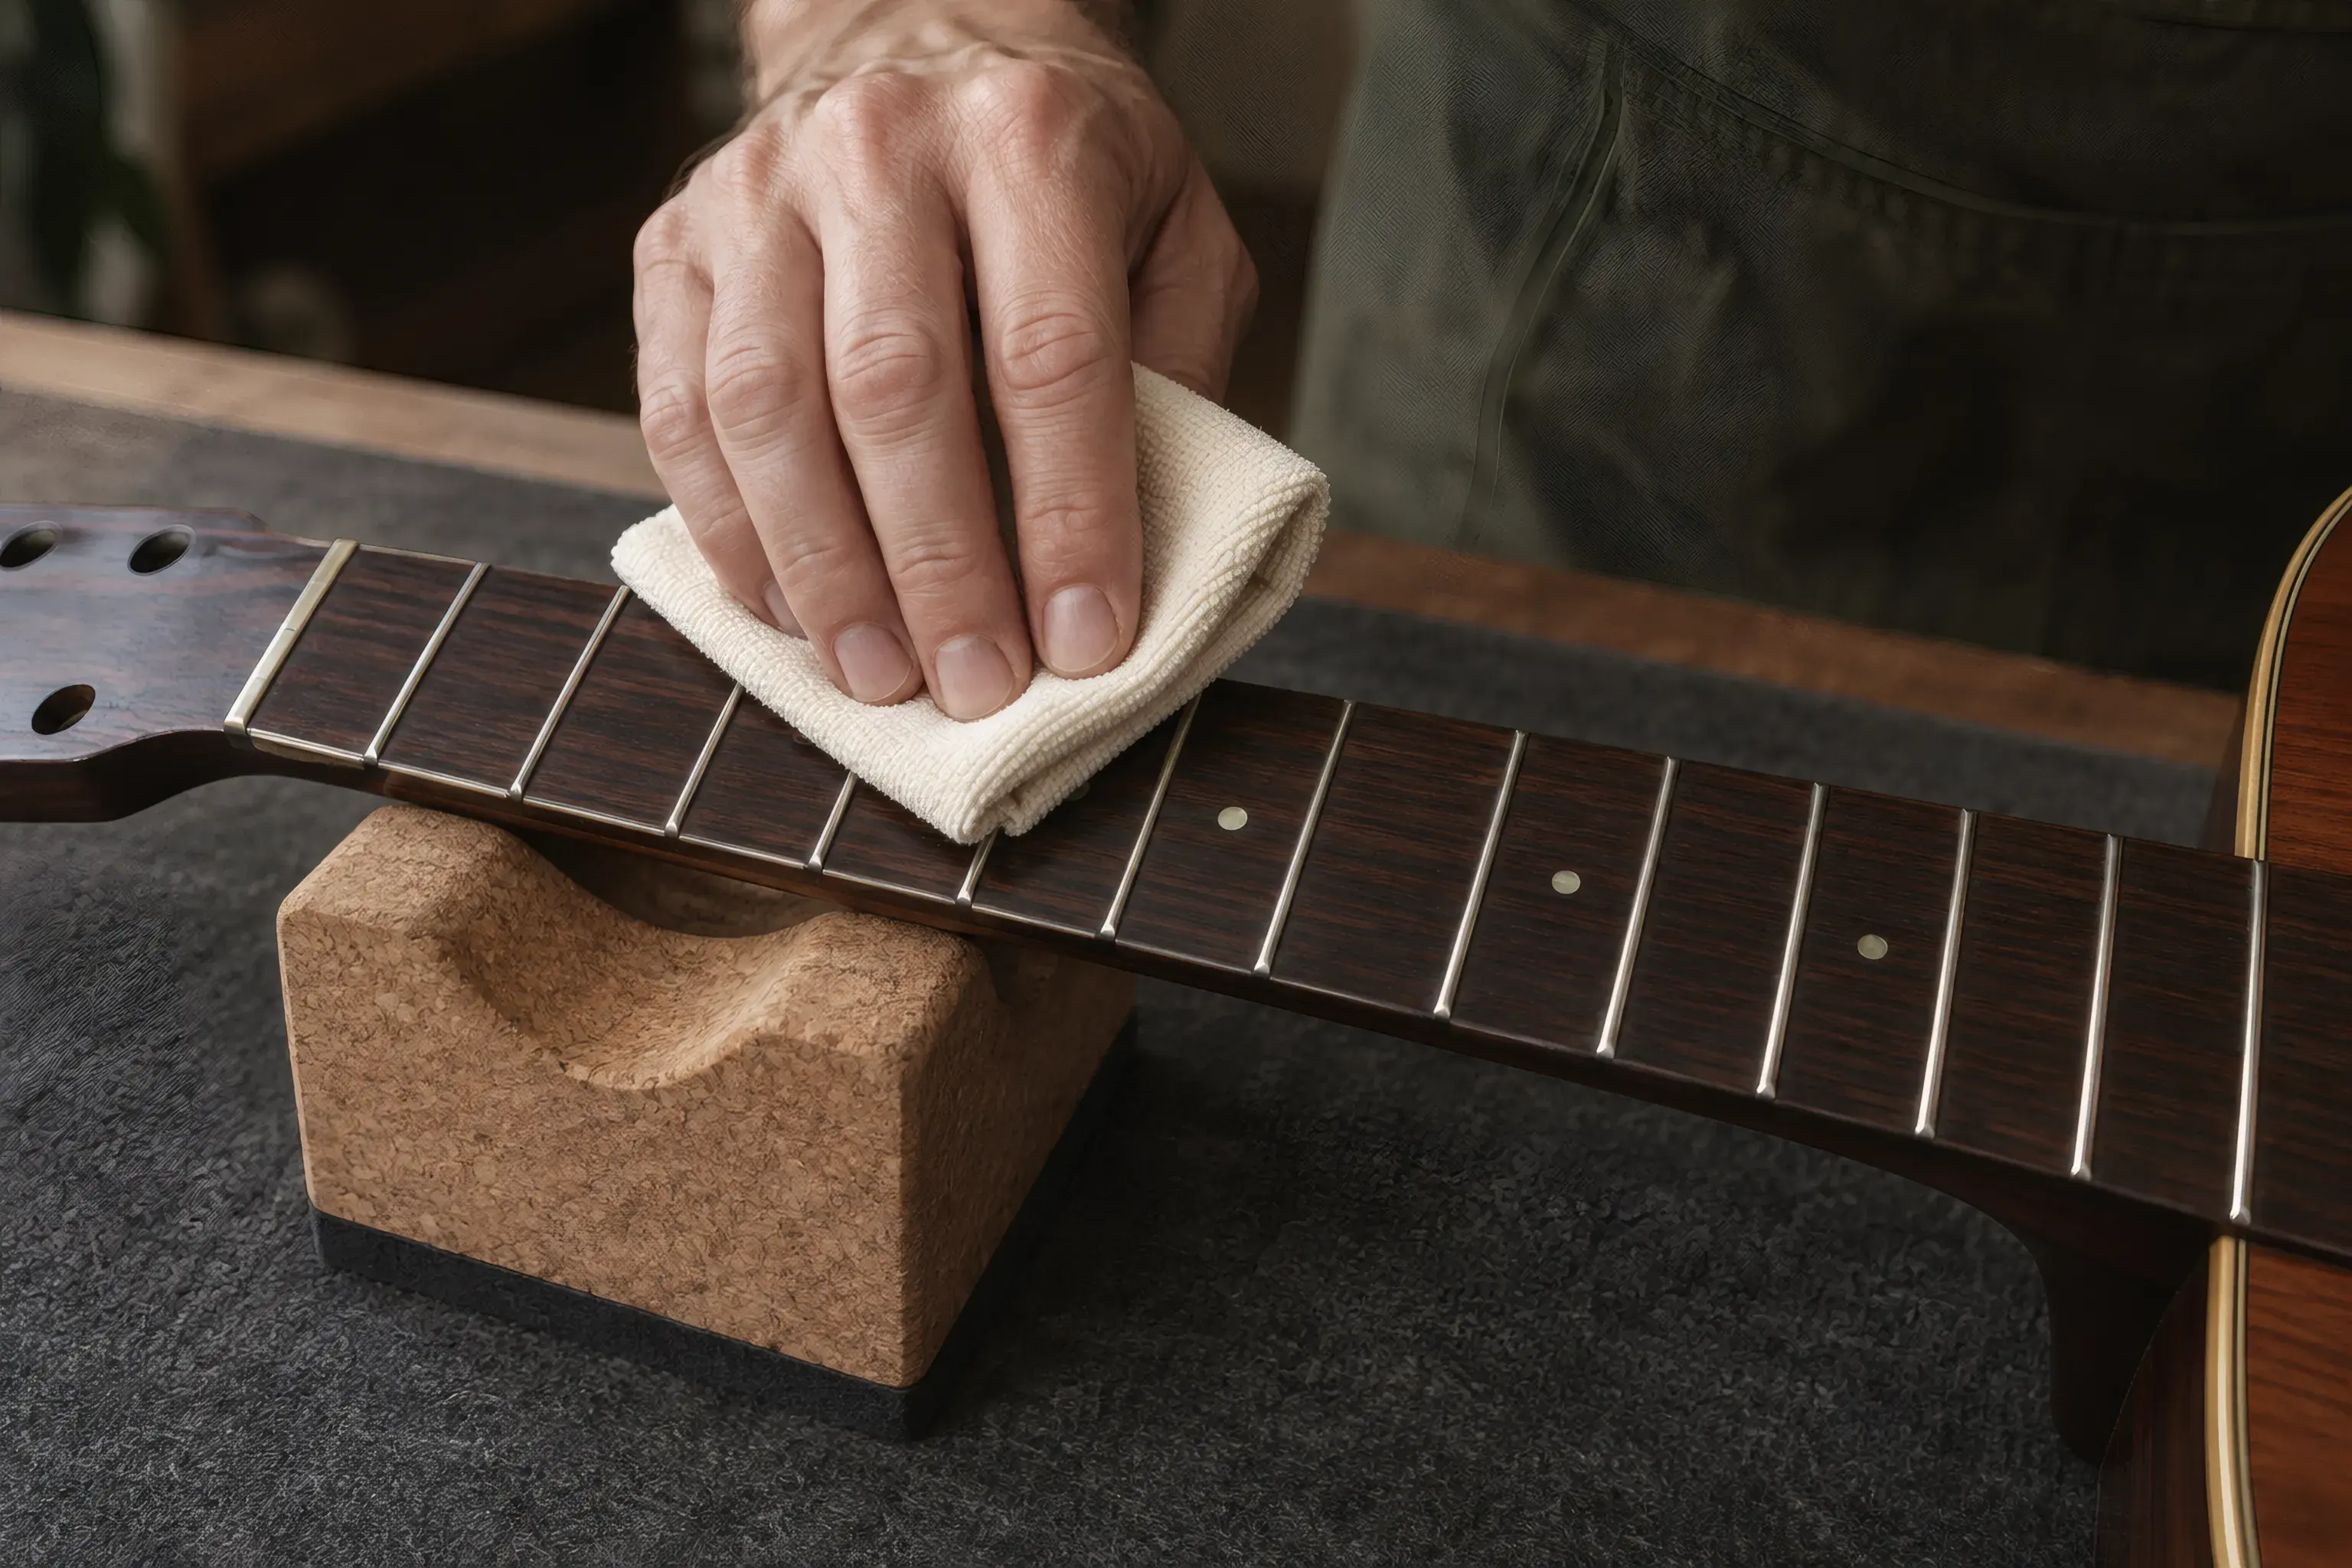
- A soft cloth. For wiping down the fretboard and body while the strings are off.
Optional but handy:
- Bridge pin puller. Many winders have one built in. Saves your fingertips on acoustic bridge pins.
- Neck rest or a rolled-up towel. Keeps the guitar stable and level while you work.
- Fretboard conditioner. Only for unfinished rosewood or ebony boards, more on that below.
When to Change Your Guitar Strings
Strings do not last forever, even if they never break. Watch for these signs:
- Dull, dead tone. The sparkle disappears and chords sound muddy, even in tune.
- Tuning instability. The guitar drifts flat faster than it used to, unevenly across strings.
- Visible wear. Dark discoloration, rough or flattened spots where you fret, fraying near the bridge.
- Rust or grime. Sticky strings or black marks on your fingers mean they are done.
- Frequent breakage. One broken string often means the whole set is fatigued.
Typical intervals: gigging players change strings anywhere from weekly to monthly. Casual players can go 2–3 months. Sweat matters too; acidic hands eat strings faster, so wipe down after playing and expect to change more often.
If you are chasing persistent tuning problems even with fresh strings, the issue usually lives elsewhere. Read why your guitar won't stay in tune before blaming the strings.
Step-by-Step: Restringing an Acoustic Guitar (Steel-String)
This is the full process for a standard pin-bridge acoustic. Work one string at a time if you are nervous about the layout; otherwise removing all six at once lets you clean properly.
1. Loosen and Remove Old Strings
Detune each string completely before cutting or unwinding anything: turn the tuner until the string flops side to side. Never cut a string under tension; the loose end whips.
Once slack, unwind the string from the tuning post. At the bridge, push the string down into the pin hole slightly, then pull the bridge pin straight up; a pin puller or the notch on a winder makes this easy. If a pin is stubborn, reach inside the soundhole and push it up from below while pulling. Never pry against the bridge with metal.
2. Clean the Fretboard and Body
With the strings off, you get rare access to the whole fretboard. Wipe it down with a dry cloth, working around each fret where grime builds up.
If your board is rosewood or ebony (unfinished, dark wood), a few drops of fretboard conditioner rubbed in and wiped dry keeps it from drying out; once or twice a year is enough. If your board is maple (light, glossy), skip the conditioner; the finish seals it. Wipe down the body while you are at it.
3. Insert New Strings at the Bridge
Match each string to its slot; packs are labeled, and the thickest goes in the low E position.
Drop the ball end into the pin hole. Push the bridge pin in with the groove in the pin facing the string, but do not jam it yet. Pull the string up gently while holding the pin down until the ball end seats against the underside of the bridge plate. The plate, not the pin, should carry the string's pull. Give the string a firm tug; the pin should stay put. If the pin pops up, the ball is riding the pin instead of sitting under the plate. Reset and try again. Leave a little slack rather than pulling the string piano-wire tight.
4. Wind Strings onto Tuning Pegs
This is where most restringing mistakes happen, so go slow the first few times.
Pull the string up to its tuner. Measure one to two tuner-posts' worth of slack past the post (roughly 5–8 cm), then kink the string at the post to mark it. Wind direction matters: on most steel-string acoustics, the bass-side tuners wind counterclockwise and the treble-side tuners wind clockwise, so the string always wraps toward the center of the headstock. When in doubt, turn the key the direction that tightens while looking at the tuner from the front.
As you wind, hold light tension on the string with your free hand. Aim for 2–3 neat wraps on the wound strings and 3–4 on the plain strings, each wrap stacked below the one before, spiraling downward; this keeps the break angle over the nut correct. On the plain steel strings, lock the tail in: pass it through the post hole, bend the end back around the post, and wind so the first wrap traps it. It will not slip.
5. Stretch and Tune
Bring each string up to pitch with the online guitar tuner; standard tuning is E A D G B E, low to high.
New strings stretch like crazy. Tune to pitch, then stretch each string: grip it around the 12th fret, pull it gently away from the fretboard a few centimeters, and retune. It will drop flat, sometimes a lot. Repeat until the string holds pitch after a stretch, usually three to five passes. This step is the difference between a guitar that stays in tune tonight and one that drifts all week.
6. Trim Excess String
Cut the string ends close to the post; leave about half a centimeter. Bend the sharp tip down or tuck it toward the post so it cannot stab your hand. Watch your eyes when cutting under tension; the cut end springs.
Restringing an Electric Guitar
The core process is identical: remove, clean, seat, wind, stretch, trim. The differences live at the bridge.
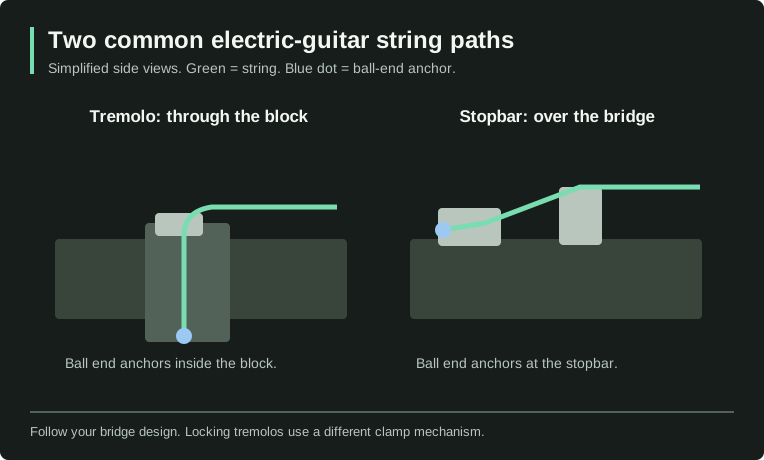
- Fixed bridge (Tele-style, tune-o-matic): simplest case. Strings load through the bridge or body and anchor with ferrules or a stopbar.
- Tremolo (Strat-style): the bridge floats against spring tension. Changing one string at a time keeps the tremolo roughly in place. Remove all six and the bridge tilts back into the cavity, normal, and it settles once everything is back at pitch. Going up a gauge also pulls the bridge up and requires a spring adjustment.
- Floyd Rose / locking tremolo: a different animal. Loosen the nut locks, detune, then release the string at the bridge clamp. Feed the new string's cut end (trim the ball off) into the saddle, clamp it down, then tune with the fine tuners centered. Change one string at a time so the bridge stays balanced.
String-through vs top-load: some guitars anchor strings through the back of the body (string-through), others at the bridge itself (top-load). The process is the same; string-through just starts by feeding through the back.
Locking tuners: no winding needed. Pull the string through the post, clamp it with the thumb wheel on the back, tune, trim. Fastest restring there is.
Restringing a Classical (Nylon-String) Guitar
Classical guitars have no bridge pins and no ball ends; the strings tie directly to the tie block. The knots take practice; expect your first few to look ugly and maybe slip once. That is normal. Here is the standard, slip-resistant tie:
- Thread 6–8 cm of the string through the tie-block hole from the soundhole side.
- Bring the long end around and behind the short tail.
- Loop the short tail over the top of the tie block and tuck it under the long section, against the back face of the block. On the treble strings, wrap the tail around two or three times; slick nylon slips more than the wound basses, which need only one wrap.
- Pull both ends snug so the knot locks against the block, then take up tension at the tuner.
At the headstock, nylon rollers have two holes or a slotted barrel. Pass the string through, wrap it around the barrel once or twice so it traps its own tail, then wind. Nylon stretches far more than steel; a fresh set can take several days of tuning to settle. Tune a little sharp at first to compensate.
One hard rule: never put steel strings on a classical guitar. The neck and bracing are not built for that tension; you can permanently damage the instrument.
Common Mistakes to Avoid
- Over-winding the posts. Ten messy wraps hold worse than three neat ones; the coil stack settles and slips. 2–3 wraps is the target.
- Winding the wrong direction. Wraps should run toward the center of the headstock on a 3+3 layout. Backwards wraps create awkward nut angles and tuning friction.
- Bad pin seating on acoustics. If the ball end jams against the pin instead of hooking under the bridge plate, the pin creeps out and the string slips flat. Always do the tug test.
- Skipping the stretch. Unstretched strings go flat constantly for days. Five minutes of stretching in step 5 prevents nearly all of it.
- Wrong gauge for the guitar. Jumping from lights to heavy mediums adds real tension; neck relief and sometimes the bridge need adjustment. Suddenly high or buzzy action after a gauge change is a setup issue, not bad luck.
- Tuning instability that is not the strings. Worn nut slots, loose tuner bushings, and intonation drift all mimic "bad strings." If fresh strings and proper winding do not fix it, check why your guitar won't stay in tune; if fretted notes sound sour even in tune, read up on guitar intonation.
String Gauges Explained
Gauge is string thickness, named by the thinnest one: a "set of 10s" starts at .010". Thicker means more tension, more volume, harder fretting.
| Gauge set | Sizes (high E to low E) | Feel | Best for |
|---|---|---|---|
| Extra light | .010–.047 (acoustic) / .009–.042 (electric) | Very easy to fret and bend | Beginners, light touch |
| Light | .012–.053 (acoustic) / .010–.046 (electric) | Balanced tension and tone | Most players, all-around |
| Medium | .013–.056 (acoustic) / .011–.049 (electric) | Firmer, louder, fuller | Hard strummers, drop tunings |
By playing style:
- Beginners: extra lights or lights. Sore fingers quit guitars; make fretting easy first.
- Fingerstyle: lights. Lower tension feels lively and responsive under the fingertips.
- Heavy strumming / flatpicking: mediums. They resist being over-driven and give you volume and headroom.
- Electric lead players who bend a lot: 9s or 10s. Bending a .013 set a whole step is a workout nobody needs.
Note your set on your phone so your next restring matches, or so you can change on purpose.
Diagrams, Audio, and Practice
Diagram: bridge pin orientation
The groove in the bridge pin faces the string. Pull the ball end up until it rests against the underside of the bridge plate, beside the pin rather than wedged against its tip. The plate carries the string tension; a rising pin means the ball end needs to be reseated.
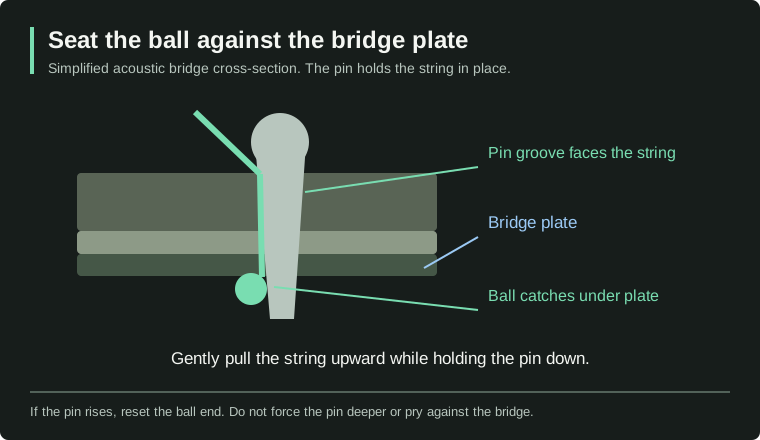
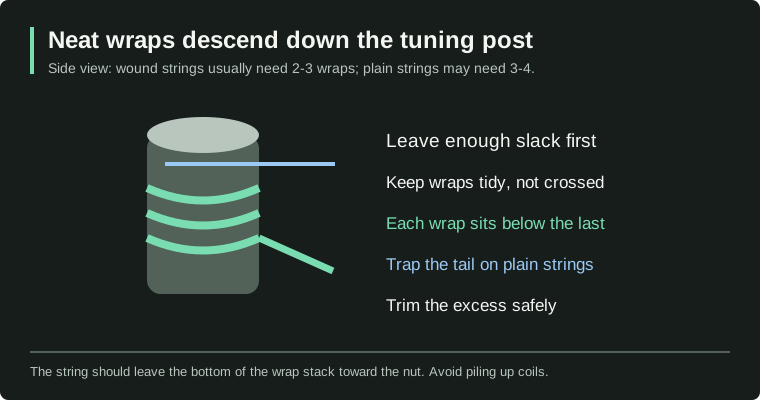
Diagram: proper winding on the tuning post
Wraps stack downward, each below the last, with 2–3 total on wound strings and 3–4 on plain ones.
Hear the difference yourself
Do not take anyone's word that fresh strings sound better. Before removing the old set, record 30 seconds on your phone: same chord progression, same room, same distance from the mic. After the restring, record the identical part and play both back to back. The old take will sound muted and fuzzy next to the new one; once you have heard it on your own guitar, you will never let strings go six months again.
Exercise: the 5-minute stretch-and-tune routine
Make this a habit for the first few days on a new set:
- Tune all six strings to pitch with the guitar tuner.
- Stretch each string at the 12th fret, top to bottom.
- Retune. Repeat until a stretch no longer drops the pitch: 3–5 rounds on day one, 1–2 on day two.
- Strum a G, C, and D chord hard for a minute, then check tuning once more.
- Done. Play.
If you want to put the fresh strings straight to work, run a few strumming patterns against the metronome at 70 BPM.
FAQ
How often should I change my guitar strings?
Gigging players: weekly to monthly. Casual players: every 2–3 months. But let the guitar tell you: dull tone, uneven tuning drift, or black fingers after playing all mean it is time, whatever the calendar says.
Can I change one string at a time?
Yes, on floating tremolos it is the recommended way, since removing all six lets the bridge tilt. On acoustics and fixed-bridge electrics, taking all six off at once is fine and lets you clean the fretboard. Replacing just one broken string works in a pinch, but a single new string next to five dead ones will sound brighter and mismatched.
Why do my new strings go out of tune?
Because they are stretching. Fresh strings, nylon especially, elongate under tension for the first day or two and drop flat until they settle. The fix is the stretch-and-retune cycle from step 5. If a string keeps slipping after that, suspect the winding: too few wraps or a sloppy coil stack. Rewind it neatly and the problem usually disappears.
Does it matter which string I start with?
No strict rule. Many techs start at one edge and work across so strings cannot cross into the wrong slot; consistency matters more than the order.
Fresh strings, fresh start
Restringing is a ten-minute skill that pays off every time you pick up the guitar. Seat the ball ends, wind clean wraps, stretch thoroughly, and tune:
- Open the online guitar tuner
- Diagnose deeper tuning problems
- Tuning lower? Choose a suitable gauge with the best strings for Drop C comparison before restringing.