Barre chords are the moment guitar stops being a campfire instrument and becomes a full one. Learn two shapes and you can play every major and minor chord on the neck, in every key, without a capo.
They're also the first thing that makes beginners want to quit. The index finger won't cooperate, half the strings buzz, and your hand aches after ten seconds. All of that is fixable, and almost none of it is fixed by squeezing harder.
Quick CTA:
- Browse the chord library: every shape below, plus fingerings
- Open the online metronome: for the drills in this guide
Anatomy of a barre chord
A barre chord is any chord where one finger (almost always the index) presses down several strings at once. Your index finger takes over the job of the guitar's nut. That's why players call it a "movable nut": whatever fret you barre at acts like fret zero, and the shape you build on top of it decides the chord.
This gives you two families of shapes:
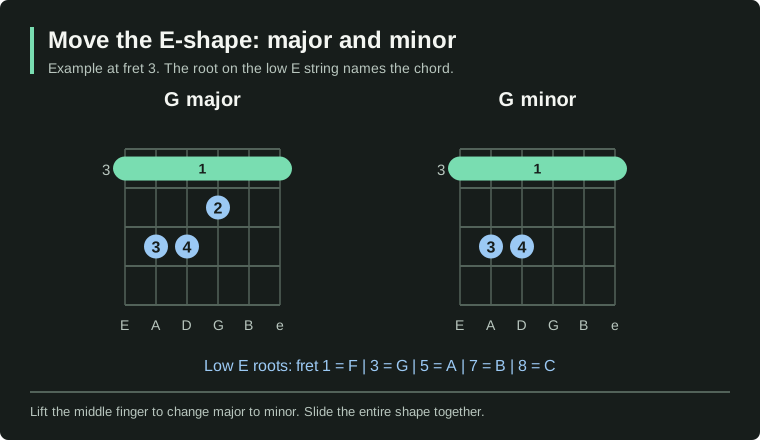
- E-shape barre chords have their root note on the 6th string (the low E string). Barre at the 1st fret and play an E major shape on top, and you get F major. Slide the whole thing up two frets and you get G major. The root is whatever note your index finger covers on the 6th string.
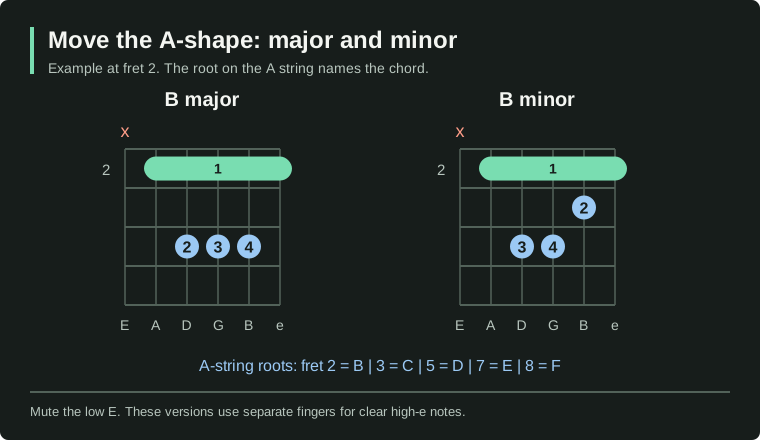
- A-shape barre chords have their root on the 5th string (the A string). Barre at the 2nd fret with an A major shape on top, and you get B major. Same deal: the barred note on the 5th string names the chord.
Knowing which string holds the root matters more than memorizing dozens of chords. Once you can find notes on the 5th and 6th strings, every barre chord becomes a shape plus a location. Use the root-note guides in the movable-shape diagrams below to get started.
The F major barre chord (E-shape)
F major at the 1st fret is the traditional first barre chord, and honestly the hardest one on the whole neck; the strings are stiffest right next to the nut. Learn it here and everything above the 5th fret feels easy by comparison.
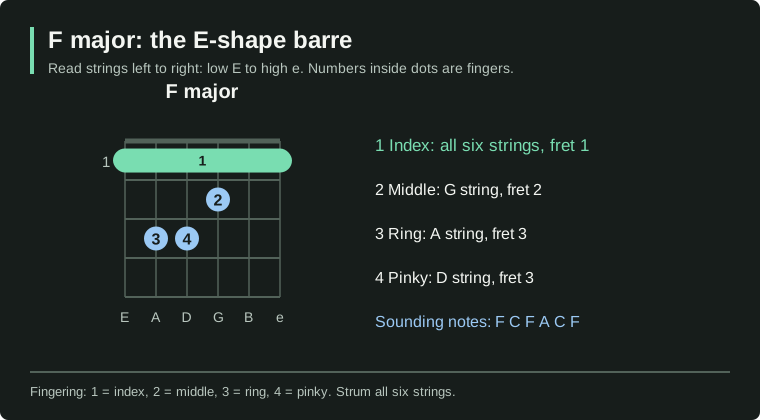
The fingering is 133211, read from the 6th string to the 1st:
e|--1--| 1st string (high E): index finger
B|--1--| 2nd string (B): index finger
G|--2--| 3rd string (G): middle finger
D|--3--| 4th string (D): pinky
A|--3--| 5th string (A): ring finger
E|--1--| 6th string (low E): index finger (this is the root, F)
Step by step:
- Lay your index finger flat across all six strings at the 1st fret, just behind the fret wire.
- Place your ring finger on the 5th string, 3rd fret (that's a C note).
- Place your pinky on the 4th string, 3rd fret (an F note).
- Place your middle finger on the 3rd string, 2nd fret (an A note).
- Strum all six strings slowly, one at a time, and listen.
Here's the string-by-string diagnostic. Play each string alone and match the problem:
| String | If it's muted or buzzing, check... |
|---|---|
| 6th (low E) | Index finger too far from the fret wire; move it closer |
| 5th (A) | Ring finger not pressing cleanly, or touching a neighboring string |
| 4th (D) | Pinky flat instead of arched |
| 3rd (G) | Middle finger pressing too softly, or buried under the ring finger |
| 2nd (B) | The classic one: index finger's fleshy underside is muting it. Roll the finger slightly (more below) |
| 1st (high E) | Tip of the index finger too short; extend it a hair past the edge of the neck |
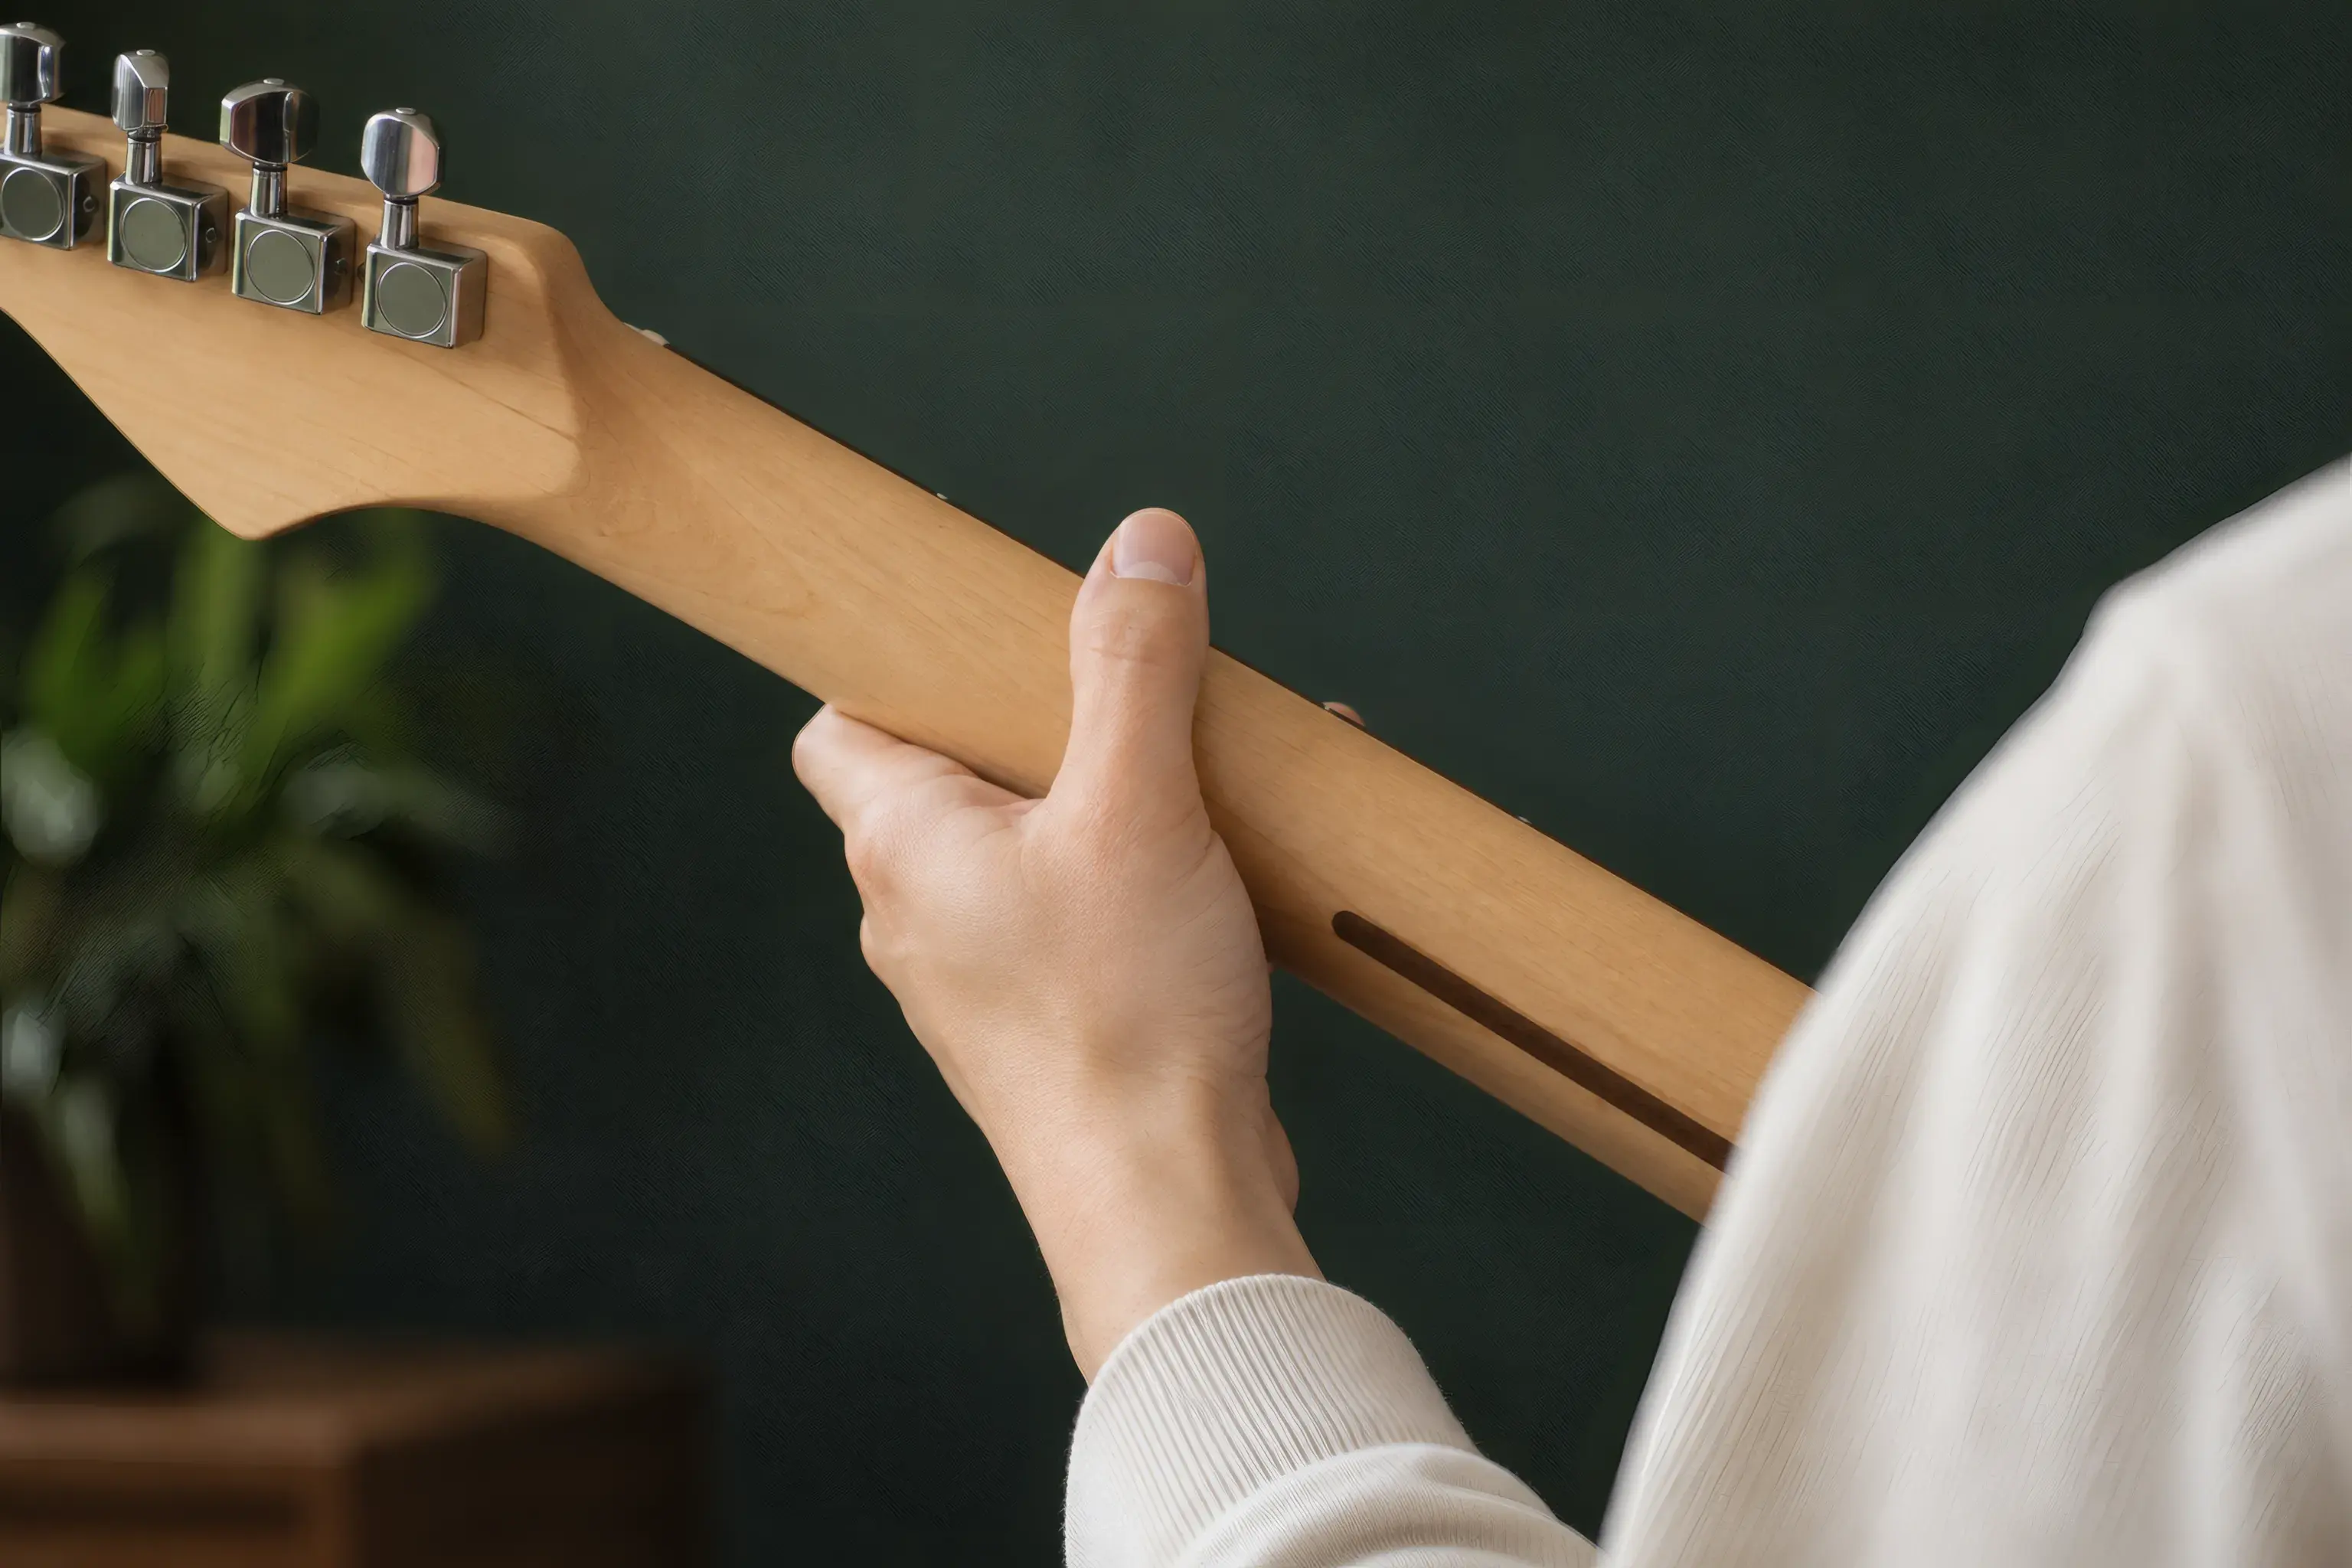
Two things fix most first-week F chords. First, thumb position: keep your thumb on the back of the neck, roughly behind your middle finger, not wrapped over the top. That gives your fingers the arch they need. Second, don't grip straight from the side; pull your elbow slightly toward your body so the hand rotates and the bony edge of the index finger faces the strings.
The B major barre chord (A-shape)
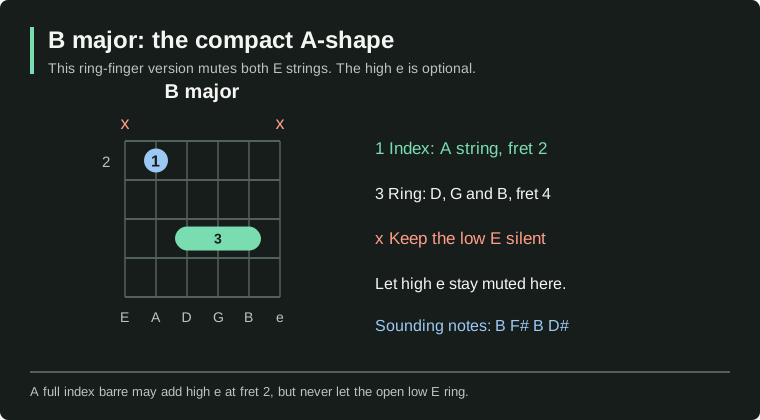
B major lives at the 2nd fret with the root on the 5th string. The fingering is x24442; the x means you don't play the 6th string.
e|--2--| 1st string (high E): index finger
B|--4--| 2nd string (B): ring finger (mini-barre)
G|--4--| 3rd string (G): ring finger (mini-barre)
D|--4--| 4th string (D): ring finger (mini-barre)
A|--2--| 5th string (A): index finger (this is the root, B)
E|--x--| 6th string (low E): don't play
The barre itself is easier here: your index finger covers the 5th string at the 2nd fret and can lightly touch the 6th string to mute it. It also holds the high E string at the 2nd fret if you include that string. The hard part is the ring finger, which has to press the 4th, 3rd, and 2nd strings at the 4th fret all at once. It's a mini-barre inside the big one.
Keep the ring finger clear of the high E string so the index finger's 2nd-fret F# can ring. If it mutes at first, don't sweat it.
Minor barre chords
Minor versions drop the third of the chord one fret, which means one finger comes off or shifts. Two shapes to know:
Em-shape (root on the 6th string). Take the F major shape and lift the middle finger. Done. At the 1st fret that's Fm: 133111.
e|--1--| index
B|--1--| index
G|--1--| index (the minor third, Ab)
D|--3--| pinky
A|--3--| ring
E|--1--| index (root, F)
It's genuinely easier than F major, one less finger, and the index barre does more of the work. Slide it anywhere: 3rd fret is Gm, 5th fret is Am, 8th fret is Cm.
Am-shape (root on the 5th string). This is the one you'll use constantly, because Bm at the 2nd fret (x24432) shows up in a huge number of songs in the keys of D and A.
e|--2--| index
B|--3--| middle
G|--4--| pinky
D|--4--| ring
A|--2--| index (root, B)
E|--x--| don't play
No mini-barre required, which is why teachers often start students on Bm before B major. If F major at the 1st fret feels impossible right now, learn Bm first; the 2nd fret is friendlier, and the shape is kinder. Check both in the chord library if you want to hear them before your hands cooperate.
Technique tips for clean barres
This is the section that matters. Barre chords are 80% position and 20% strength. Run through these in order.
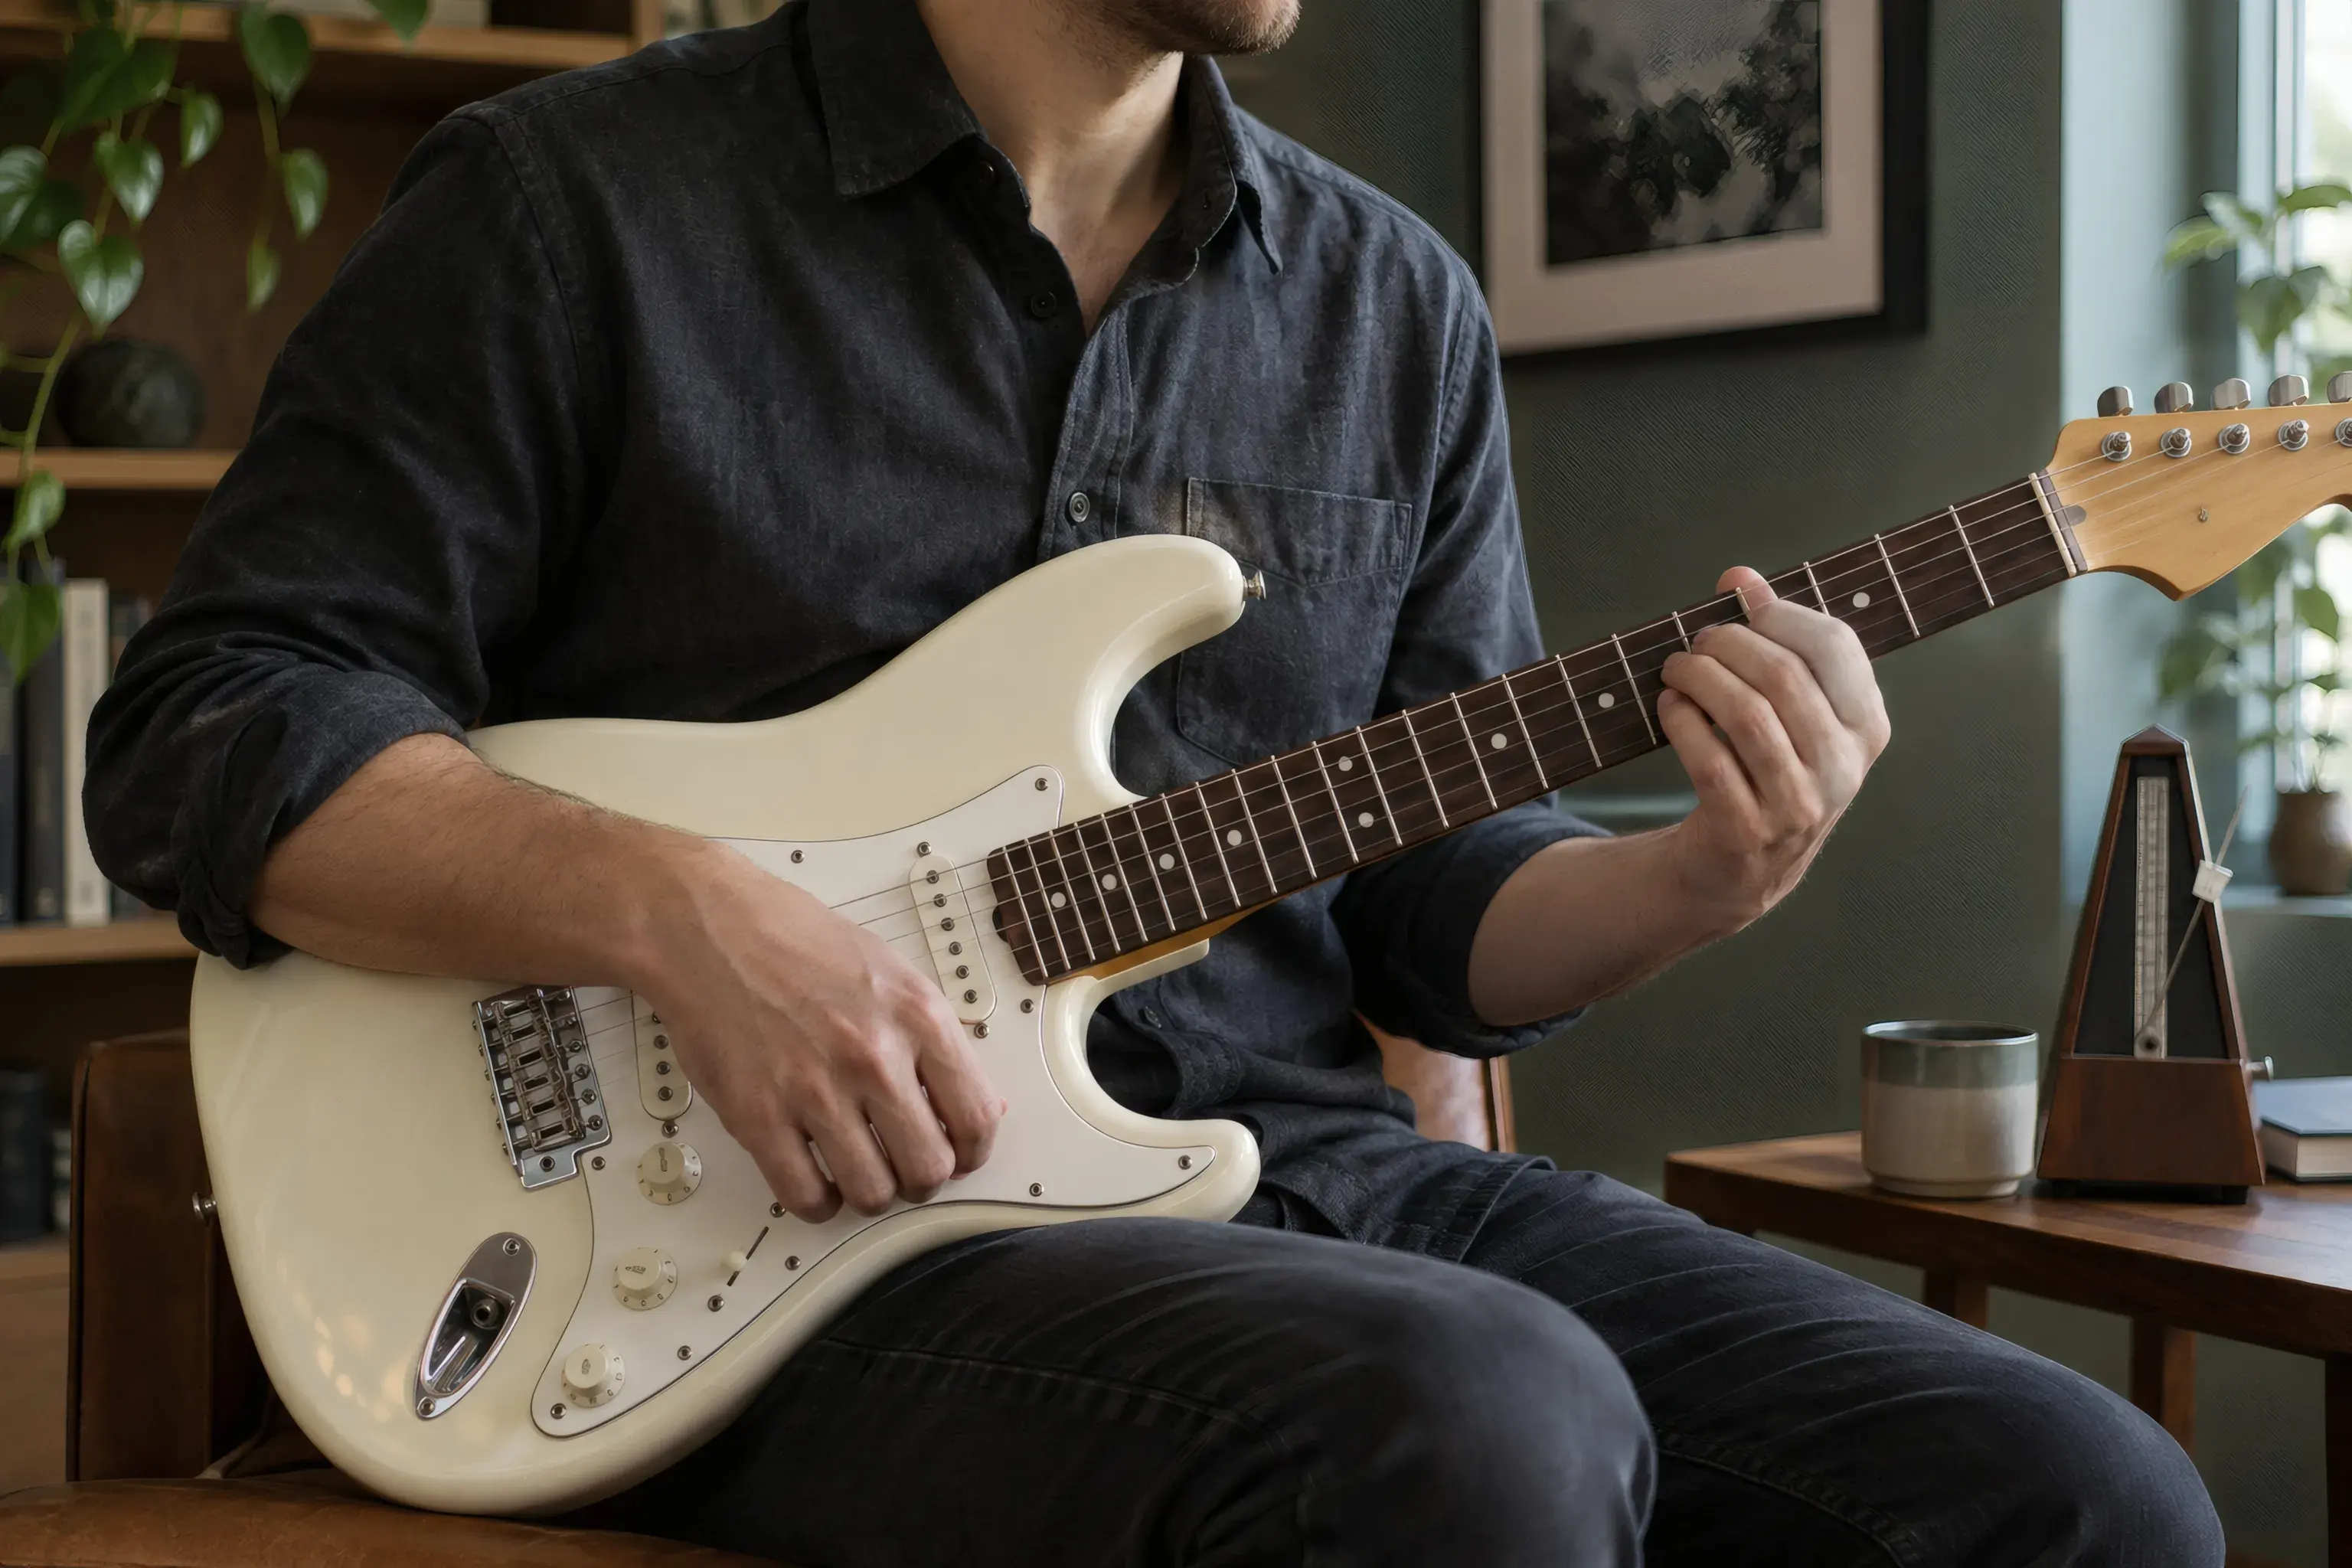
Roll the index finger. The underside of your finger is soft and has a crease at the joint; strings hide in it. Rotate your hand slightly so the strings press against the side of the index finger, closer to the bone. This single change fixes more buzzing than any amount of extra pressure.
Thumb behind the neck. Park your thumb on the back of the neck, behind your index or middle finger. Wrapping it over the top feels strong but collapses your finger arch and kills your reach. You want a gentle pinch between thumb and index, like holding a sandwich, not crushing a soda can.
Elbow in, wrist down. Pull your fretting elbow in toward your ribs and drop your wrist slightly forward. This rotates the hand into that bony-edge position automatically and opens up the stretch between your fingers.
Press close to the fret wire. Not on top of it, right behind it. The closer you are to the wire, the less pressure the string needs to sound clean. Mid-fret is where buzz lives.
Use only the pressure you need. Here's a test: fret the chord, strum, then slowly relax your grip until strings start to die. Add back just enough pressure to bring them back to life. That minimum is your target. Most beginners press two or three times harder than necessary, which is why the hand cramps.
Stop at pain. Discomfort from a new position is normal for a few weeks. Sharp pain in the wrist, the thumb joint, or the forearm is not. Stop, shake the hand out, reset your position, and try again in a minute. Pain is a positioning error talking, not a weakness to push through. Never "just squeeze harder."
Building strength and endurance
Barre chords take weeks, not days. That's not a failure; the muscles involved are small and genuinely new to your hand. Most students I teach get a clean F major somewhere between week three and week eight of daily practice, and endurance (holding barres through a whole song) comes later than the first clean sound. Your mileage will vary, and slower isn't worse.
The daily two-minute drill. Set a timer for two minutes, once a day:
- Fret an F major barre. Strum once, string by string.
- Release completely. Shake the hand out for two seconds.
- Repeat until the timer ends.
Releasing between reps is the point. It teaches the minimum-pressure habit and builds stamina without turning your hand into a claw.
Partial barres as stepping stones. Barre only the top two or three strings at the 5th fret, where they are usually easier to deflect than near the nut, before tackling all six at the 1st fret. This changes the fretting effort, not the string's longitudinal tension. A three-string barre that rings clean lets you practice the mechanics on fewer strings.
The chromatic climb. F → F# → G, one fret at a time, up the neck:
F (1st fret) . F# (2nd fret) . G (3rd fret) . G# (4th fret) . A (5th fret), then back down
Legend: each chord is one strum of the full E-shape barre, moving up one fret each time. Do it with a metronome at 60 BPM, one chord per click. The shape often feels easier around the 5th fret because the strings are more compliant away from the nut and the frets are closer together, not because string tension drops along the neck. Work toward smooth, silent chord switches; metronome practice for chord changes has the full drill for that.
Common mistakes and fixes
The high strings (1st and 2nd) go dead. Nine times out of ten it's the index finger's soft underside. Roll to the bony edge, and nudge the fingertip slightly past the edge of the fingerboard so the high E sits under firmer flesh.
Buzzing on the low strings. First check finger placement and pressure. If buzzing persists across the neck with good technique, have a technician check for action that's too low, insufficient neck relief, or uneven frets. Lowering the action reduces fret clearance and can make buzzing worse.
Excessive fretting effort. Action that's too high (strings sitting far from the fretboard) can make clean barres unnecessarily hard. Ask a technician to check the nut slots, neck relief, and saddle height rather than lowering everything blindly. Setup changes can affect guitar intonation, so check that afterward too.
Hand fatigue after twenty seconds. You're pressing too hard, or your thumb is too high. Reset with the minimum-pressure test from the technique section. Also check your string gauge: heavy strings (like a .012 or .013 acoustic set) demand noticeably more force than light ones (.010s). Lighter strings are a legitimate tool while you build the position, more on that in the FAQ.
Everything sounds right but slightly out of tune up the neck. Hard pressing bends strings sharp, especially on electric guitars with tall frets. Another reason the minimum-pressure habit matters and another reason to keep an ear on tuning while you practice. Thirty seconds with the guitar tuner before each session keeps you honest.
Diagrams and audio
Once F and B work, the whole neck opens up. Both shapes are fully movable; the pattern never changes, only the starting fret.
Quick reference for finding any chord from the root string:
| Root on 6th string (E-shape) | Fret | Root on 5th string (A-shape) | Fret |
|---|---|---|---|
| F | 1 | Bb / A# | 1 |
| F# / Gb | 2 | B | 2 |
| G | 3 | C | 3 |
| G# / Ab | 4 | C# / Db | 4 |
| A | 5 | D | 5 |
| Bb / A# | 6 | Eb / D# | 6 |
| B | 7 | E | 7 |
| C | 8 | F | 8 |
Hear the difference yourself. This part is an exercise, not a demo. Record thirty seconds of yourself strumming an F barre chord right now, before changing anything. Then work through the technique section above for a week and record the same thirty seconds again. The before-and-after gap (muted strings turning into ringing ones) is the only proof that matters, and your phone's voice memo app is all you need.
Put it in a song: I–IV–V in G, barres only. Three chords, all barre shapes:
- G: E-shape barre at the 3rd fret (355433)
- C: A-shape barre at the 3rd fret (x35553)
- D: A-shape barre at the 5th fret (x57775)
Strum four beats per chord:
G G G G | C C C C | G G G G | D D D D
Legend: each chord name is one downstroke on the beat, four per bar. Run it with the metronome at 70 BPM until the switches are clean, then nudge the tempo up. For more places to take it next, use the chord library to explore other voicings of these chords.
FAQ
Why can't I get all strings to ring?
Almost always the 2nd string (B) and 1st string (high E), and almost always the index finger's soft underside muting them. Roll the finger onto its bony edge, move it closer to the fret wire, and extend the fingertip slightly past the neck edge. Then diagnose string by string with the table in the F major section; each muted string points to a specific fix.
How long does it take to master barre chords?
A clean sound on one shape typically shows up within a few weeks of daily practice; playing them comfortably through songs takes a few months. There's no fixed timeline; hand size, guitar setup, and how often you practice all shift it. Anyone promising barre chords "in seven days" is selling something. Short daily sessions beat weekend marathons every time.
Should I use lighter strings while learning?
Yes, it's a real option, not cheating. Dropping from a .012 acoustic set to .010s (or from .010s to .009s on electric) meaningfully reduces the pressure barre chords demand. The trade-off is slightly less volume and bass response. Many players learn on light strings and move up later, or just stay there, like plenty of pros do.
Next step: make the shapes ring
Open the chord library, pull up F and Bm, and run the two-minute drill today. Put the metronome under the chromatic climb, and give it a few honest weeks. Barre chords are a door, not a wall.